Tag Archive: driver’s license

Worried About Passing Your Driving Test?
October 2, 2012
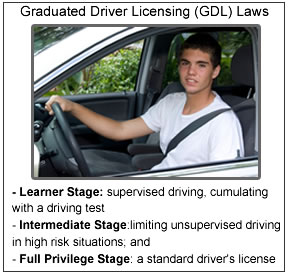
How much have you practiced your driving skills? The GDL Laws of most states require you to get a learner’s permit or instruction permit first before you get your driver’s license. This is the time when you practice your driving skills either with a parent or driver education instructor. Most states require you to have a minimum of 40 to 50 hours of driving practice during the learner’s permit stage. It is suggested to use a driving experience log so you practice all the maneuvers you’ll be tested on. Here is an example to PRINT.
When you are ready to get your license remember the following driving skills as this is what they will be testing you on during the road test:
- Obey the traffic signals and signs
- Avoid hitting the curb or cones while parking
- Three point turn is the most comment reason for failing the exam – so get lots of practice during your learner’s permit phase especially on narrow streets!
- Put on your seat belt before starting the vehicle.
- Properly yielding to other traffic when changing lanes.
- Using your turn signal when turning, changing lanes, or turning into or backing out of a parking space
- Safe driving around school buses and school zones.
- Maintain a two to three-second following distance.

Teens Most Likely To Crash In Their First Month Of Solo Driving
August 16, 2012
- failure to reduce speed,
- inattention, and
- failure to yield.

Driving Lesson: Road Parking Tips
May 20, 2012
Parking is as much an important part of driving as driving itself. Learning how to park in different circumstances is an important part of the road test. The road test examiner may ask you to park in a parking lot space, to parallel park, or both. You need to know the proper procedures:
Signaling – Remember that you should signal your intentions at all times; even in a parking lot. Turn on your turn signal before you begin your turn into a parking space to let other drivers know what direction you are turning in. You should also signal as you exit the space to let other drivers know what direction you will be going in as you exit the space.
Parking lot– The examiner may point to a specific parking spot in the parking lot for you to park in. The spot may be lined on either side with orange cones to represent cars in the adjoining spaces. If you were to hit one of the cones, it will mean an automatic failure. Practice parking in a space by looking toward the center of the space before you begin your turn and keeping your eyes on the center of the space as you pull into the parking spot. Don’t look at the hazards on either side; look at where you want to put your car. Keep practicing until it is second nature.
Parallel parking – The examiner will point out a spot and ask you to demonstrate your ability to parallel park and, just like in the parking lot, there may be cones in front and back representing the bumpers of other cars; you don’t want to hit them. Parallel parking is really easy but it takes a lot of practice. Pull up even and about two to three feet away from the vehicle in front. Turn your wheel all the way to the right and slowly start to back up. As you come even with the rear bumper of the car next to you, start turning your wheel to the left. Once you enter the space, adjust your car so that it is parked an even distance between the car ahead and the one in the rear. You should be no more than eighteen inches from the curb.
Parking on a hill – The examiner may ask you to demonstrate or explain the procedures for parking on a hill with or without a curb.
- Downhill with or without a curb – Parking facing downhill is easy. Whether there is a curb or not, you should always turn the front wheels to the right so that, if your brakes should fail, the car will roll off of the roadway.
- Parking uphill without a curb – Parking facing uphill without a curb means you should turn your wheels to the right. Just like parking downhill, if your brakes should fail, the car will roll off of the roadway.
- Parking uphill with a curb – This is where it gets a little different. When parking facing uphill with a curb, you want to turn your front wheels to the left, toward the center of the road. Once you have turned your wheels, you will want to back up just a bit until you feel the wheels bump up against the curb. In this case, if your brakes should fail, the car’s front wheels should jam up against the curb and prevent the car from moving any further.
Parking properly is easy but it does take practice. Make sure you practice each maneuver until it becomes second nature to you before you take your road test.
Need extra practice? Take our behind the wheel road test course. It’s 100% online and shows you exactly what the examiner will be looking for.

Tips for Safely Changing Lanes During your Road Test
December 14, 2011
While taking your road test, the examiner may ask you to change lanes. Changing lanes is not a simple operation and the examiner will be looking to see if you follow all of the proper procedures to ensure that you change lanes safely.
Here are some tips on how to safely change lanes:
Assess the situation on the road ahead. Are there other vehicles trying to merge into your lane? Are there pedestrians ahead who are about to cross? Should you even change lanes? A big thing to look out for are vehicles in the lane you are about to change into flashing their brake lights or slowing down, it might indicate that there’s trouble in that lane and that changing lanes wouldn’t be worth it.
Use the rearview mirror to check motorists behind the vehicle. Check all of your mirrors before changing lanes. Is anyone behind you or in the far lane preparing to move into the lane you want to enter? Are there vehicles speeding up to get in on the lane you’re trying to change into?
Make a habit of always signaling other drivers about what you’re about to do on the road. Letting other motorists know your intentions will keep both you and them safe. This is especially true for changing lanes – drivers behind you have to make their driving decisions based on what you do. Make a habit of always giving signals for everybody’s benefit.
Check your blind spot before moving in. Before changing lanes, quickly turn your head with your chin over your shoulder to check your blind spots. It’s amazing how quickly a vehicle can move up and totally disappear in your blind spot.
When it comes to intersections, only change lanes before or after passing them. Remember, it is illegal to change lanes within 100 feet before or after an intersection.
For more practice consider taking a simulated behind-the-wheel online prep course offered through OfficialDMV.com.

How to Get a Florida License Reinstated on a Hardship License
August 8, 2011
Having your license revoked or suspended can cause different things to different people. Some people may end up losing their job if they are not able to get there. Some students may end up failing classes or even needed to drop out of school. Whatever it was that caused you to lose your driving privileges, there might be hope. Depending on the circumstance of the suspension, some drivers may be given the opportunity to pursue a hardship license.
A Florida hardship license is a special license that allows drivers to get to drive only to very specific places, while they work on getting their full license back. In short, it allows people to drive to and from work/home/school, while they work on their full license.
In some cases, it is mandatory (for Habitual Traffic Offenders) for a driver to take up advanced driver training BEFORE they are able to apply for a hardship license. This is the way to get a license reinstated.
These are the steps required in getting a Florida license reinstated:
Request for your driving record – In some instances, you may order this online, or you may get it from your local clerk of court.
Contact your local Administrative Reviews office – You have to submit your driving record and your course enrollment letter to your local Administrative Reviews office. They are the government agency that will grant you your hardship license if you are eligible.
Complete Advanced Driver Improvement Course – If you are eligible, you may be able to obtain your hardship license from the hearing officer. With this hardship license, you are now able to drive to your school or place of work. You have to complete advanced driver training to get your driver’s license reinstated. If you are classified as a Habitual Traffic Offender, you will be required to take the course before even applying for a hardship license.
Not being able to get anywhere can become the ultimate form of inconvenience our time and freedom. Do not waste it. Become a better driver, keep yourself and others safe when driving.
